适用于 MacOS 的小部件样式应用程序
如何在macOS上构建Siri的小部件样式应用程序。
与传统的基于窗口的界面相比,小部件样式的应用程序具有许多优势:
- 小部件风格的界面管理自己在屏幕上的位置,从而消除了用户的责任。
- 由于小部件样式的界面是守护程序,因此可以比必须打开的应用程序更快地查看它们。
- 对于与配套应用程序配合使用以提供附加功能的小部件,小部件样式的界面通常较小,因此使用户能够在使用微件的同时仍能很好地查看其主要内容,而视觉开销很小,
但是,Apple尚未为我们提供在macOS上实现小部件样式界面的方法。AFAIK 这个项目是第一个实现小部件样式 UI 的非 Apple 应用程序。
Meet Wiji, a virtual assistant inspired by the type-to-Siri interface and the new ACT-1 transformer. In this tutorial, you’ll learn how to build him. Of course, we will only be focused on the UI in this tutorial and not the backend of a virtual assistant.
Functional Requirements:
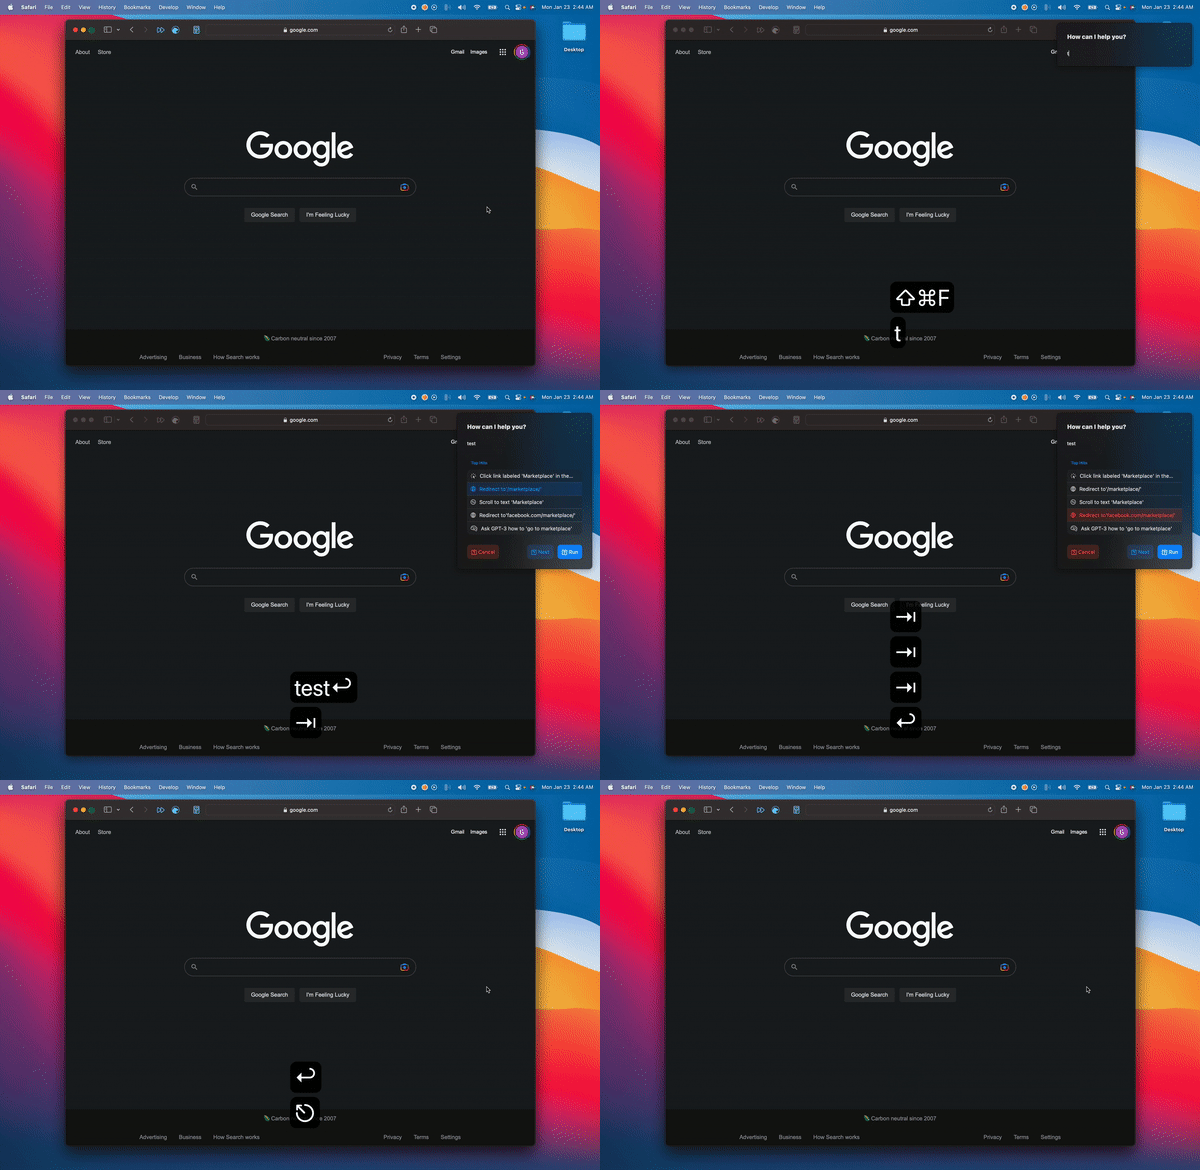
- Users must be able to summon and dismiss the widget with a keyboard shortcut
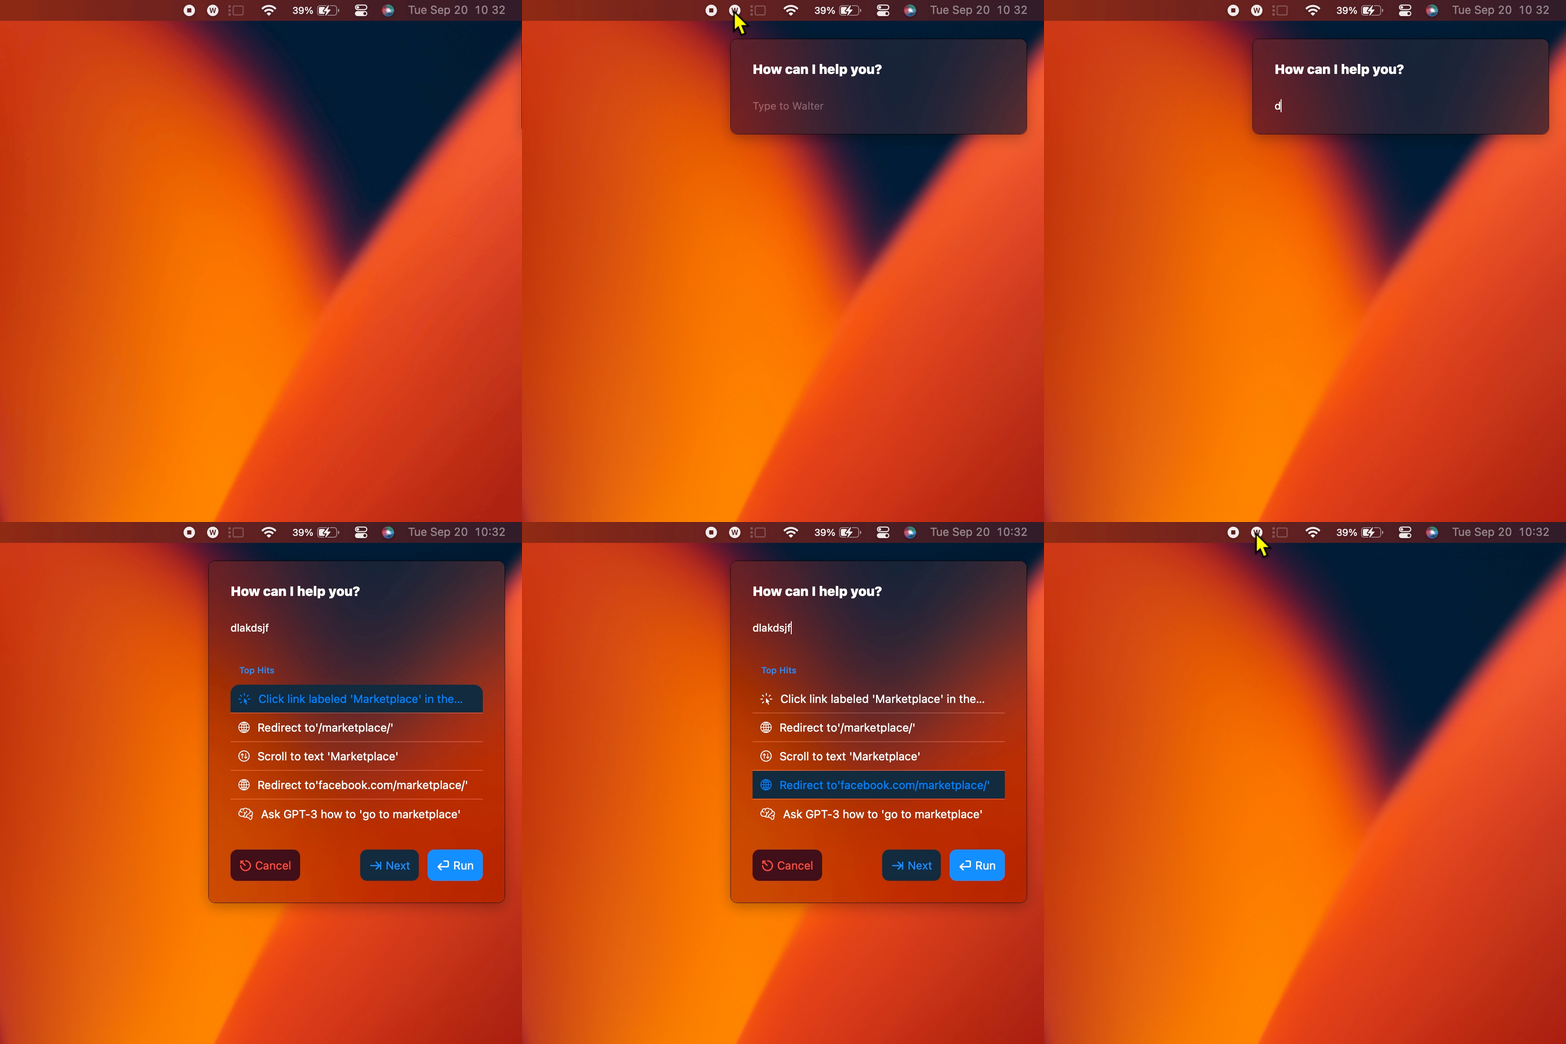
- Users must be able to summon and dismiss the widget via a menubar item.
- The widget must be animated, sliding on the screen after it’s displayed and sliding off the screen just before it hides.
- The widget needs to be able to keep its top-right corner fixed (barring some slight bouncing animation) within the window, even if the size of the SwiftUI ContentView changes.
- Widget-style interfaces cannot have multiple instances.
Nonfunctional Requirements:
- The code for our widget should integrate seamlessly with SwiftUI.
- The widget app must be a daemon (background process) to eliminate latency to open.
Approach
There are six broad steps to make an app like this.
- Don’t show app icon in dock
- By default, SwiftUI will create an instance of your app using a traditional window. Hence, step one is to implement our own entrypoint for our app. Our custom function will simply set our app’s delegate to a subclass “AppDelegate”, and pass in a SwiftUI view to that delegate.
main - We’ll need to code our classes and extensions to actually make a widget-style app. These is where we’ll ensure our app looks, behaves, and animates like a widget.
- We’ll need to use @soffe’s HotKey package to toggle the status of our app using a keyboard shortcut.
- We’ll need to set up an NSStatusBarItem that will togge the hide/show state of our app.
- We’ll need to create some SwiftUI views to actually put in our widget. That part’s up to you!
Step 1: Stop app icon from showing in dock.
A key feature of widget style apps is they don’t clutter up your dock. To do this, set “Application is Agent” to true in your target’s info.plist.
Step 2: Implement a custom lifecycle.
Open Xcode and create a new project with a SwiftUI lifecycle. Direct your attention to the WijiApp.swift file. The @main decorator is a shorthand way of setting up our app using default settings. The reason we must implement our own main method is that the default main method will create a traditional NSWindow containing our ContentView, which clearly isn’t what we want. To implement a custom main function, we’ll create a protocol “WidgetApp”. The only requirement is that this protocol must contain a main function in order to work with the @main decorator. The simplest way of doing this is to just demand a function in the protocol and instantiate your from within the function. However, this leads to weird looking code where the struct is empty. Personally, I think it looks better (and leads to better separation of view code and logic code) if you also add a function to the protocol, and then implement that function with in the struct.main()ContentViewmainWijiAppmakeViewWidgetAppWijiApp
@main
struct WijiApp: WidgetApp {

  static func makeView() -> any View {
    return ContentView()
  }

}

protocol WidgetApp {
  static func main()
  static func makeView() -> any View
}

extension WidgetApp {

  static func main() {
    let cv = makeView()
    let app = NSApplication.shared
    let delegate = AppDelegate(contentView: cv)
    app.delegate = delegate

    _ = NSApplicationMain(CommandLine.argc, CommandLine.unsafeArgv)
  }

}
Step 3: classes and view hierarchy
There are several important classes we’ll have to implement.
Constants
The first thing we’ll need to do is set up some globally-available constants. Create a Constants.swift file and add , and . Now, it doesn’t matter what you set your windowWidth to, but it’s up to you to ensure this matches what the width of your window actually will be. Also, it’s important that you use padding so that no view is as wide as the ContentView’s frame. In the case of Wiji, I ended up adding two intermediate variables, which I also used in my ContentView.swift view code.let distanceFromSideOfScreen: Double = 20let animationDuration: Double = 0.3let windowWidth = ...
let contentViewWidth: CGFloat = 290
let contentViewPadding: CGFloat = 25
let windowWidth = contentViewWidth + 2 * contentViewPadding
The reason this is important will become clear later on, but I’ll also provide a breif explanation here. The hostingView that holds all your SwiftUI views will be listening for any size changes of any view. But we only want to actually animate and resize the hosting view if the resize notification is from the main ContentView. The way I get around this is by only resizing the hostingView if the resize notification sends a frame with the same width as WindowWidth. I know it sounds janky but until the SwiftUI engineers come up with a way of listening for resize notifications on the rootView only, this is the best we can do. I’ve spoken to a SWE at Apple and he said it’s an issue they know about and are working on.
WidgetWindow
The first is an NSWindow subclass that can slide, which we’ll call WidgetWindow. This subclass will use widget-type styles (such as a full-size content view, level = floating, and a null titlebar). We’ll plug into the AppDelegate methods and to ensure that the WidgetWindow slides in or out whenever the app becomes active or is about to become inactive. In your initializer for your WidgetWindow class, add the following behaviors/appearances. The example project contains some additional settings for Wiji, but all of those are optional (such as setting the title) and don’t seem to have any effect but may be useful for accessibility.applicationWillBecomeActiveapplicationWillResignActive
let screenSize = NSScreen.main!.visibleFrame.size
let initialRect = NSRect(x: screenSize.width, y: screenSize.height, width: windowWidth, height: screenSize.height)
super.init(contentRect: initialRect, styleMask: [.fullSizeContentView], backing: .buffered, defer: true)
self.level = .floating // ensures the window floats in a level above all other windows (see documentation)
self.collectionBehavior.insert(.fullScreenAuxiliary) // widget can appear even when another app is fullscreen.
self.backgroundColor = .clear
Also make sure this window can become key or else we won’t be able to interact with it: . The last thing we need to implement for WidgetWindow is the ability to slide on and off screen in an animated way. Here’s how we can do that.override var canBecomeKey: Bool { return true }
extension WidgetWindow {

  func computeOnScreenRect() -> NSRect {
    let screenFrame = NSScreen.main!.visibleFrame
    let off_screen_rect = NSRect(x: screenFrame.width, y: 0, width: self.frame.width, height: screenFrame.height)
    return off_screen_rect
  }

  func computeOffScreenRect() -> NSRect {
    … // similar to above.
  }

  func slide(direction: Direction) {
    NSAnimationContext.runAnimationGroup({ context in
        context.duration = animationDuration
        let destinationFrame = direction == .onscreen ? computeOnScreenRect() : computeOffScreenRect()
        self.animator().setFrame(destinationFrame, display: false, animate: true)
    })
  }

}
AppDelegate
Like we discussed, the AppDelegate will be responsible for calling the WidgetWindow’s slide function when appropriate, like so:
func applicationWillBecomeActive(_ notification: Notification) {
  NSApp.getWindow().slide(direction: .onscreen)
}

func applicationWillResignActive(_ notification: Notification) {
  NSApp.getWindow().slide(direction: .offscreen)
}
But also, we’ll want to have our AppDelegate actually create an instance of WidgetWindow when the app finishes launching. Direct your attention to the createWidgetWindow function to understand the hieratchy. See attached gif to understand the frame of each of these windows/views. Note that what appears purple is actually the overlay of the blue WidgetWindow and the red FlippedView.
WidgetWindow (blue, alpha = 0.2)
  └──FlippedView (red, alpha = 0.2)
     └──AnimatedHostView (green, alpha = 0.2)
        └──ContentView (frosted glass)
FlippedView
The only purpose of the flipped view is just to flip the coordinate system of the window. NSWindows have coordinates where (0,0) is the bottom left, but since we’re aligning our widget to the top, it’ll be easier if (0,0) were the top left. I wish we were able to flip the coordinate system of windows directly but a workaround is to just use a view like FlippedView. You could easily do this project without flipping the coordinate system as well but you’d end up having a bunch of expressions like rather than just being able to write .NSScreen.main.height - 2020
class FlippedView: NSView {
  override var isFlipped: Bool { true }
}
AnimatedHostView
As discussed before, we listen for resize notifications. If it comes from a SwiftUI view that has the same width as the window, then we match that resize. Since the SwiftUI view is smoothly animating, this view will be too. We have to both add the observer and set the frame size on the main thread to avoid studdering in the animation.
class AnimatedHostView: NSHostingView<AnyView> {

  override func viewDidMoveToWindow() {

    self.setFrameOrigin(NSPoint(x: 0.0, y: distanceFromSideOfScreen))

    NotificationCenter.default.addObserver(forName: NSView.frameDidChangeNotification, object: nil, queue: .main, using: { notification in
      if ((notification.object as! NSView).className == "SwiftUI._NSGraphicsView" && (notification.object as! NSView).frame.width == windowWidth) {
        DispatchQueue.main.async {
          guard let view = notification.object else { return }
          self.setFrameSize((view as! NSView).frame.size)
        }
      }
    })

  }
}
Step 4: Implement HotKey to toggle app state.
First, add HotKey to your project via the Swift Package Manager. Then, in your app delegate file, import Hotkey and use in the completion handler.NSApp.toggleActivity()
import HotKey

extension AppDelegate: NSObject, NSApplicationDelegate {

  let hotKey = HotKey(key: .f, modifiers: [.command, .shift], keyDownHandler: {
    NSApp.toggleActivity()
  })

  ...
}
Now, let’s actually define :toggleActivity
func toggleActivity() {
  if self.isActive {
    makeInactive()
  } else {
    NSApp.activate(ignoringOtherApps: true)
  }
}

func makeInactive() {
  NSAnimationContext.runAnimationGroup({ _ in
      NSApp.getWindow().slide(direction: .offscreen)
    }, completionHandler: {
      NSApp.hide(nil)
  })
}
Recall, that activating/deactivating the app will cause the AppDelegate to automatically trigger animations.
Step 5: Implement StatusBarController:
It only takes 22 lines of code to add a menu bar item to our app. It’s a lot of boilerplate code, but the key thing is that we have make NSApp.toggleActivity() the action of the menubar item.
class StatusBarController {
  private var statusBar: NSStatusBar
  private(set) var statusItem: NSStatusItem

  init() {
    statusBar = .init()
    statusItem = statusBar.statusItem(withLength: NSStatusItem.variableLength)

    if let button = statusItem.button {
      button.image = NSImage(systemSymbolName: "w.circle.fill", accessibilityDescription: "Launch Wiji Widget")
      button.action = #selector(toggleApp)
      button.target = self
    }
  }

  @objc func toggleApp() {
    NSApp.toggleActivity()
  }
}
Step 6: Create a SwiftUI View
The example app contains a lot of SwiftUI views related to the query field and suggestions, but that’s not really the point of this tutorial. Just to have a minimal example, use the following as your ContentView:
struct ContentView: View {
  @State var tall: Bool = false

  var body: some View {
    VStack {
      Text("Congratulations!")
      Button(tall ? "Shrink" : "Grow") {
        withAnimation {
          tall.toggle()
        }
      }
    }
    .frame(width: contentViewWidth, height: tall ? 700: 200)
    .padding(contentViewPadding)
    .background(.ultraThinMaterial)
    .cornerRadius(8)
  }
}
